Setting up the Catecut Shopify App on your Shopify store
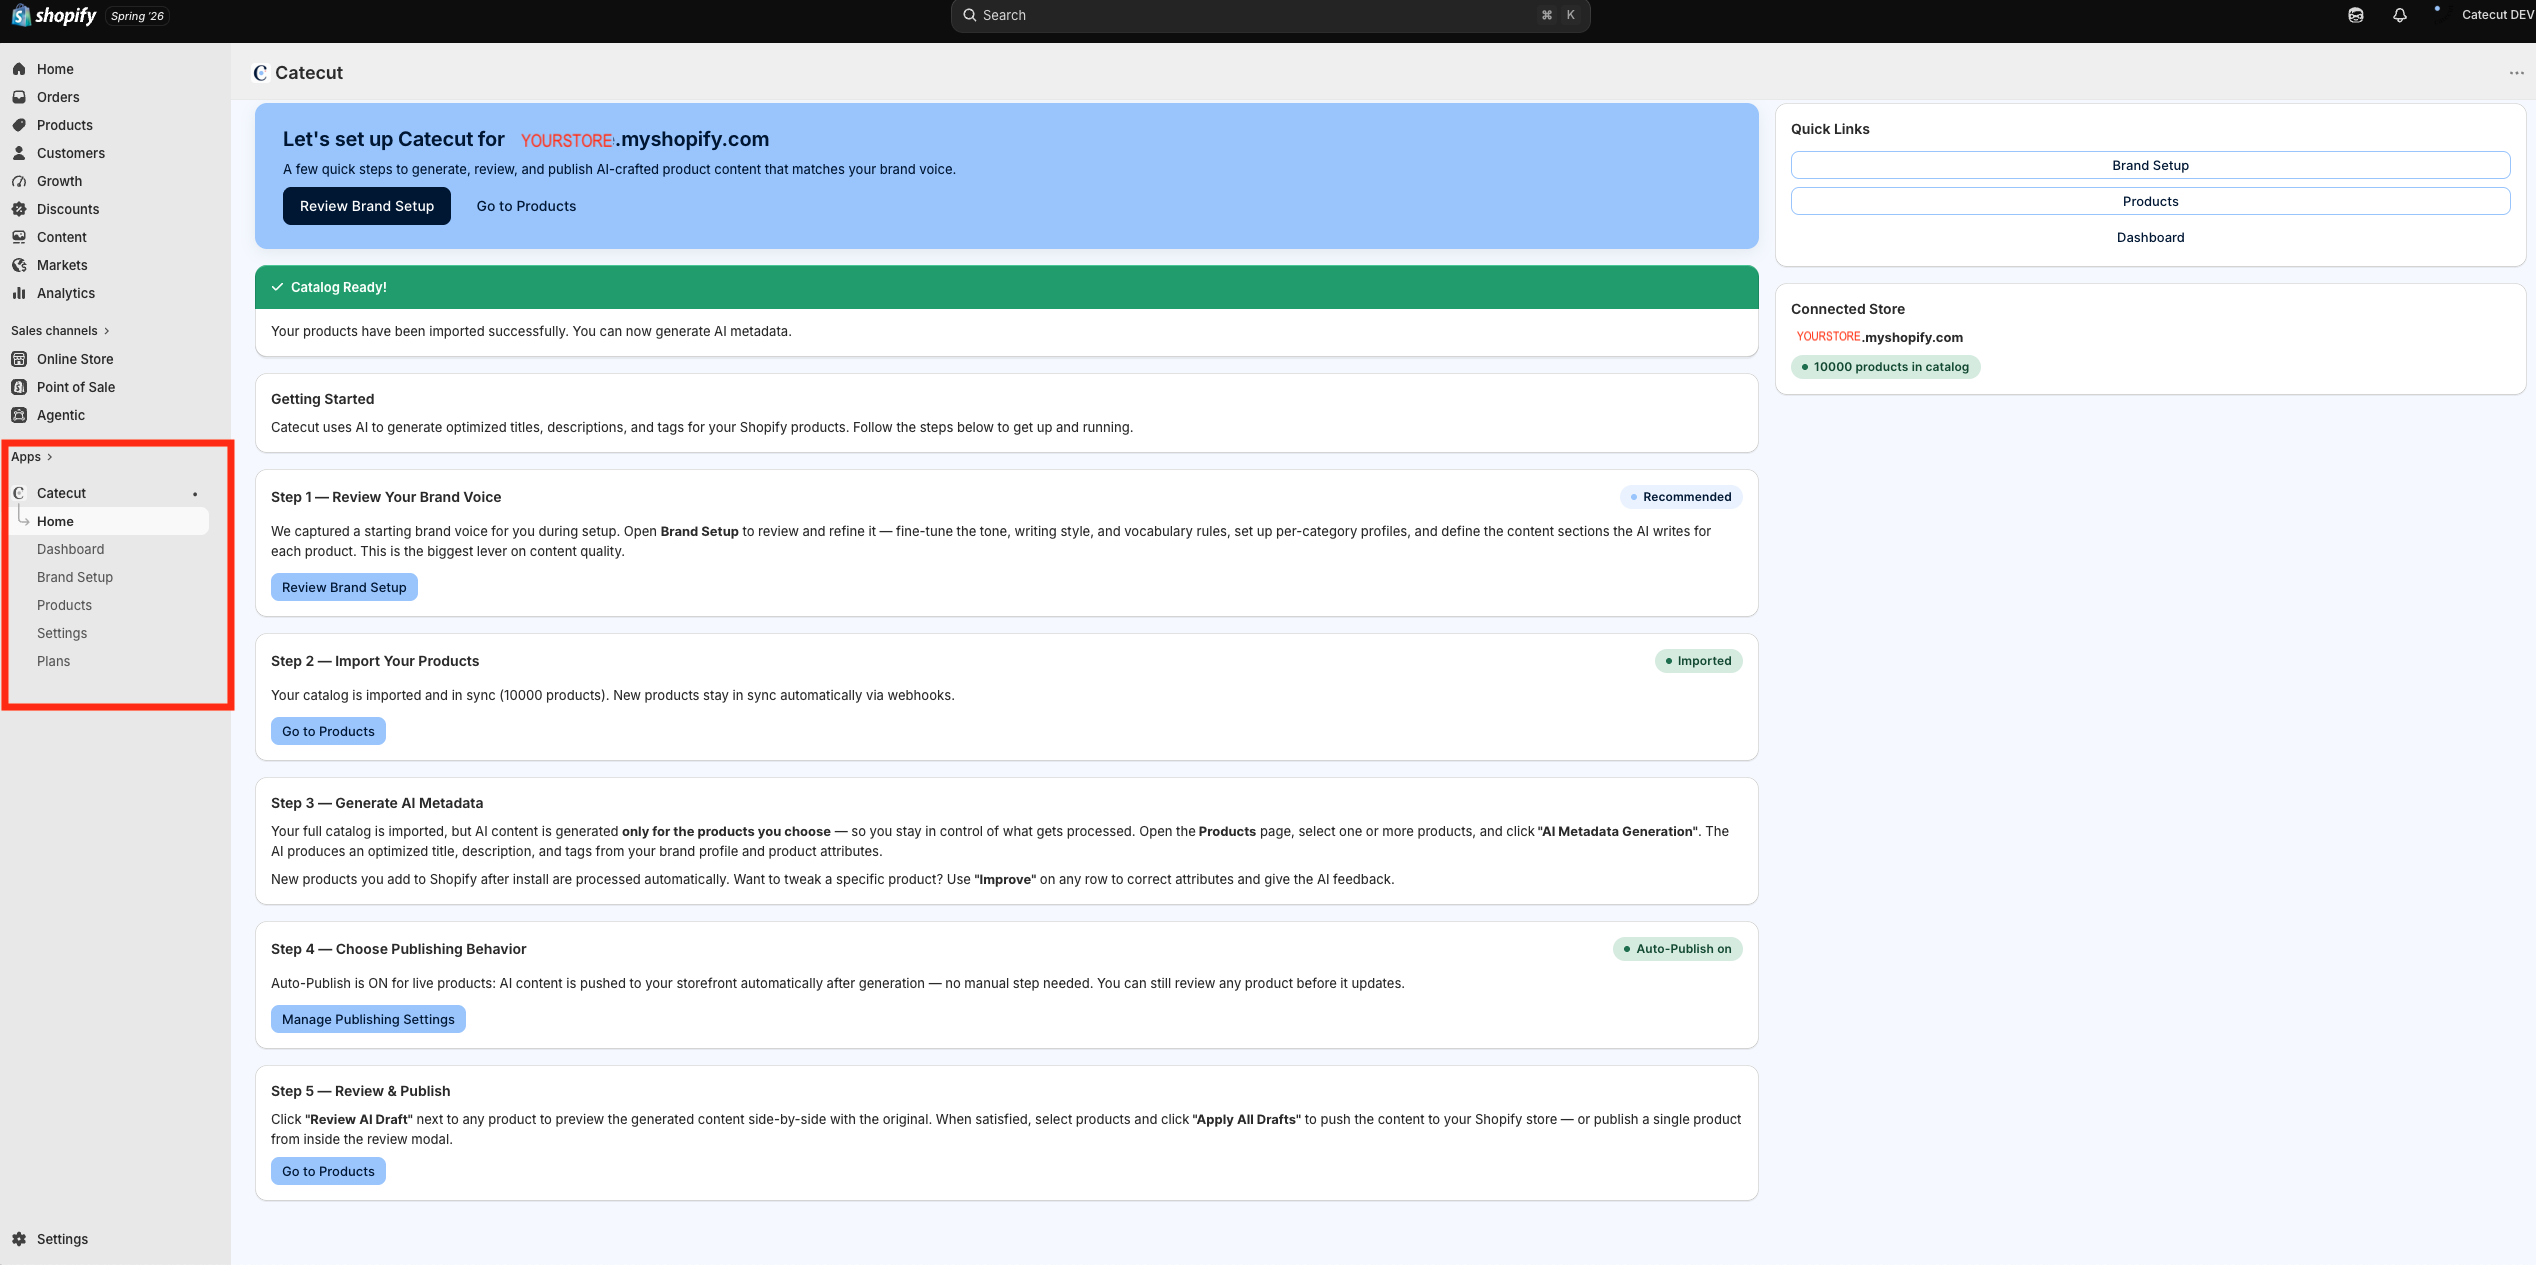
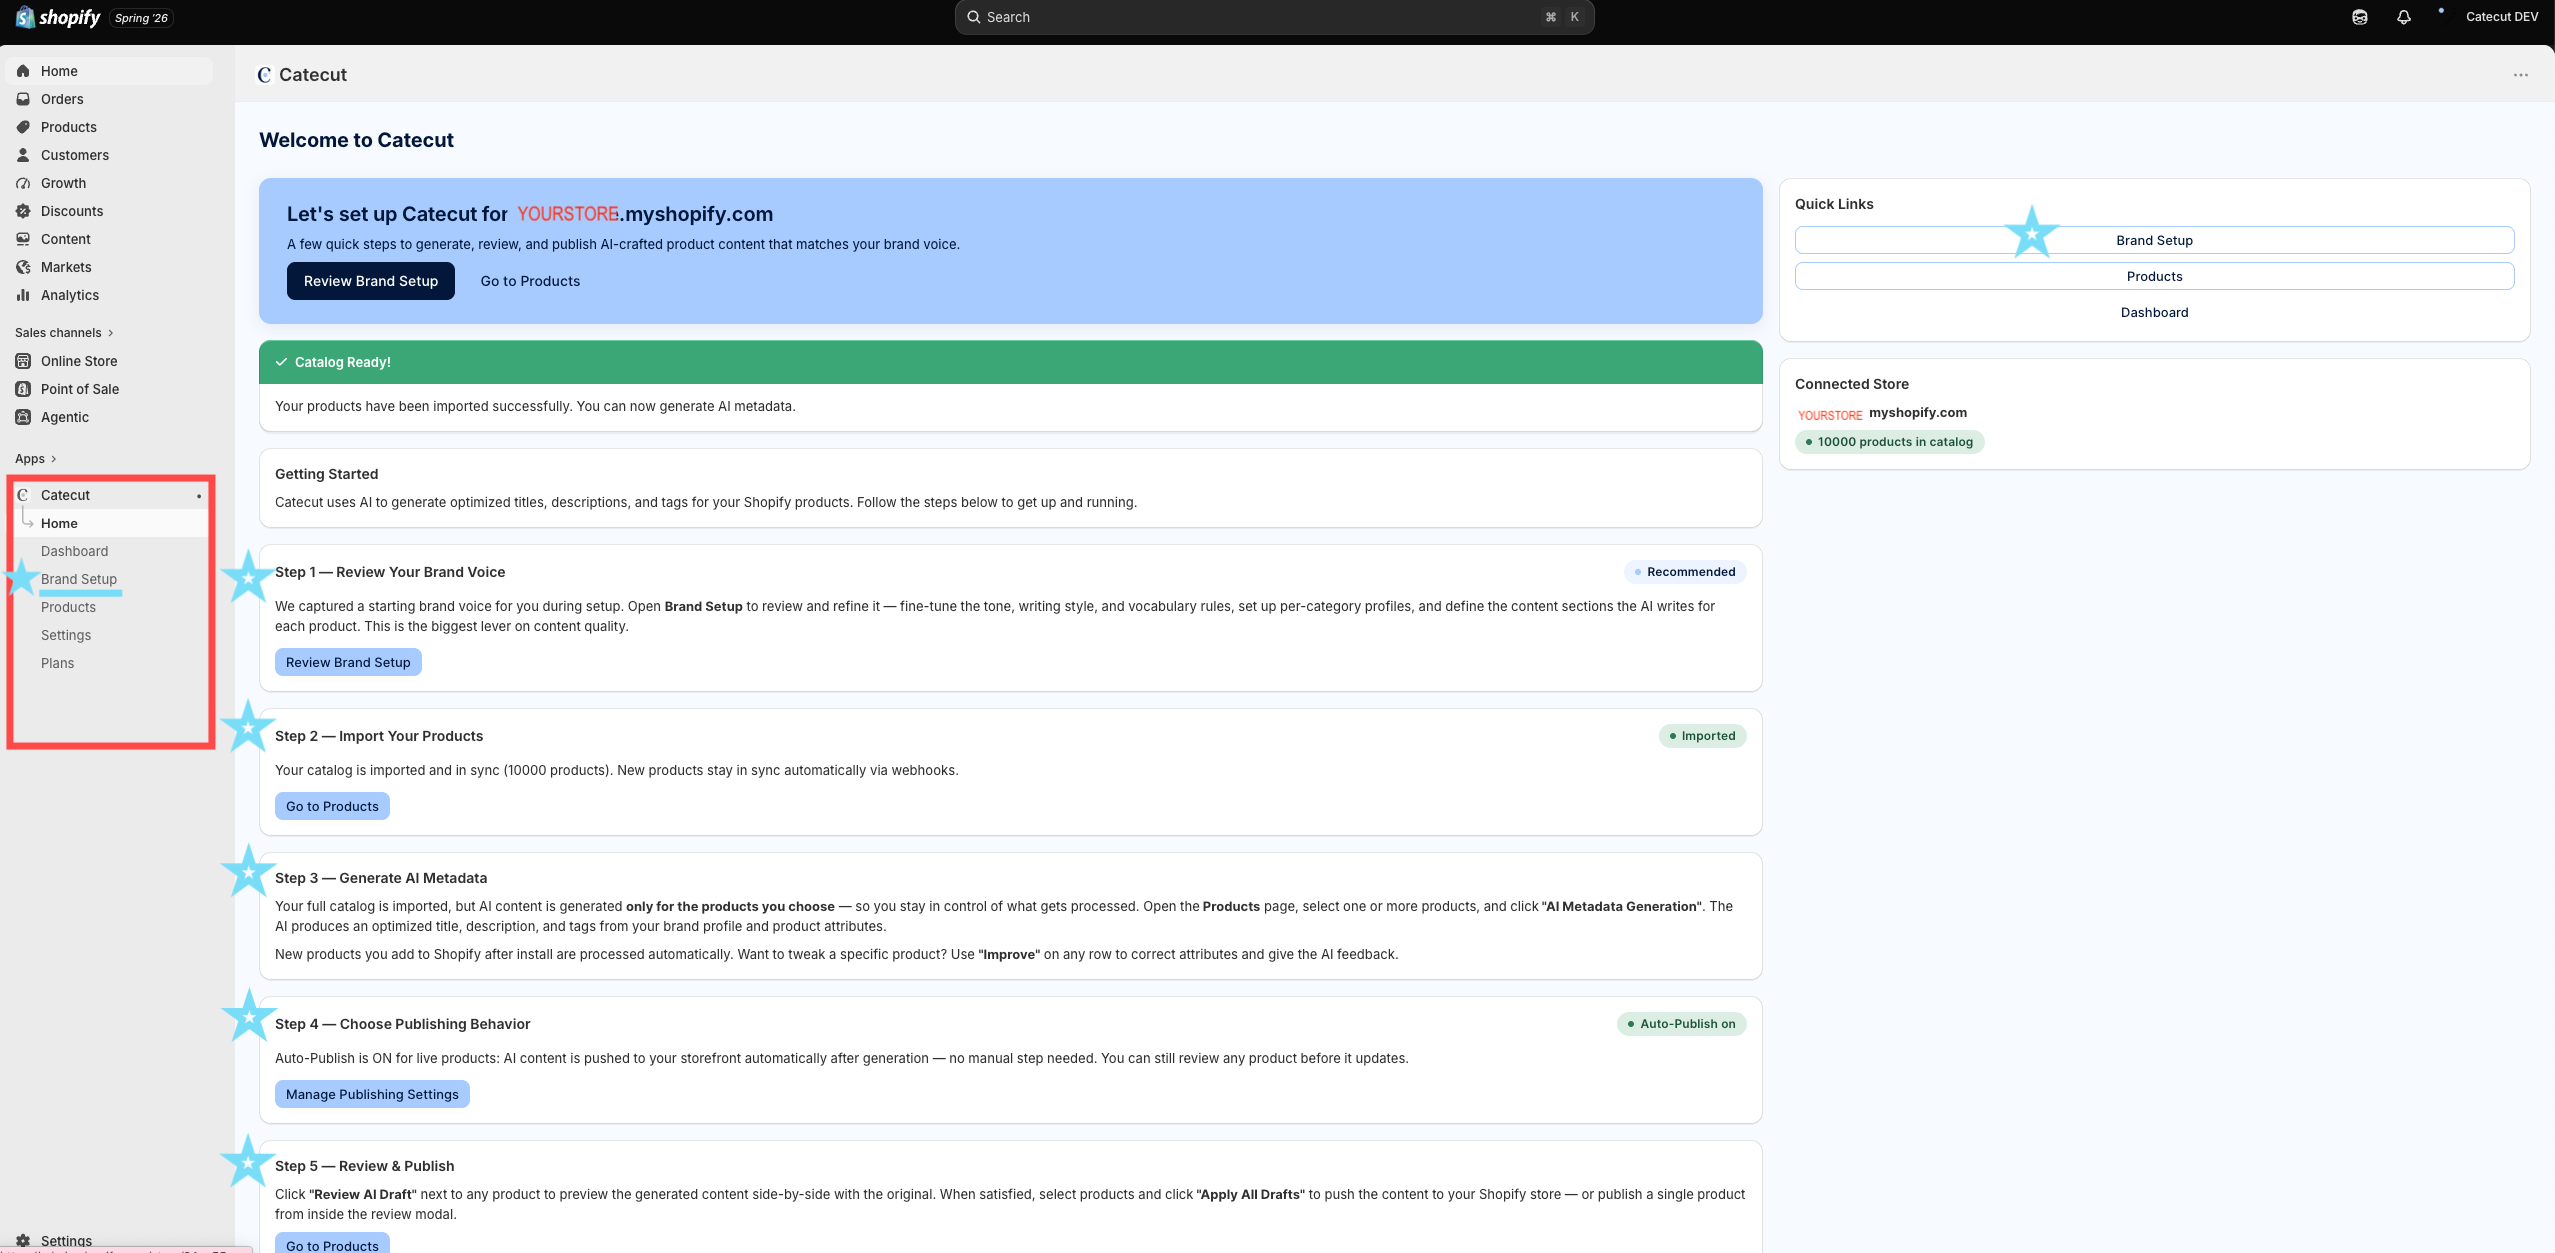
Congrats and welcome to Catecut! We’re thrilled that you chose Catecut to automate your product content. On this page, you’ll see instructions for each section of our app to get you up and running as quickly as possible. To get started, double click the Catecut icon under Apps.
When Catecut is enabled, your existing products are already imported (See STEP 2, below).
In order to generate content and tags for these products, you will need to (hold on, not yet) go to the “Products” section within the Catecut app and select any or all products for which you want content and tags generated. Before doing this, we strongly recommend you go through Step 1: Brand Setup.
Any time you want to return to the main Setup page in the Catecut app, just click “Home.”
STEP 1: Brand Setup
Setting up your brand and page rules is easy but necessary. It sets the tone, format and rules for what content shows up on your product pages, and exactly how that content shows up on your store.
Some brands have existing brand guides and page formats, while others can use Catecut to create these rules and processes from scratch. Likewise, you can simply extract this information from your existing pages.
Click Brand setup in the menu bar.

Here you will see an overview of your brand and product categories that have been detected or added. At the top, you will see a “Default” section, which is designed for your overall brand and merchandising guides and rules.
Within each product category, you can establish or paste your brand voice, content or merchandising guides, sections (formatting of the product pages themselves), and title formats. The final step of each section is preview & save.
Then, each product category can have its own guidelines and rules. If these areas are not filled out, the default section will become, well, the default.
To streamline setup, within each of these sections, you can simply “extract from catalog” and Catecut will pull already existing information to inform the setup.
Note for multibrand retailers: Specific brand requirements for 3rd party brands you carry can be attributed to “Collection” rather than in this area of brand setup.

STEP 2: Product import

Product import into Catecut is automated once you’ve installed the Catecut app. This is because Catecut connects directly to your store backend and is alerted when new draft product pages are updated with imagery. On the Catecut “Home” section you will be able to see the status of product imports, and click directly into the Product section.
STEP 3: Generate AI Metadata
To generate AI metadata, you simply go to the Products section within the Catecut app (note: not the main Products section of your Shopify store menu).
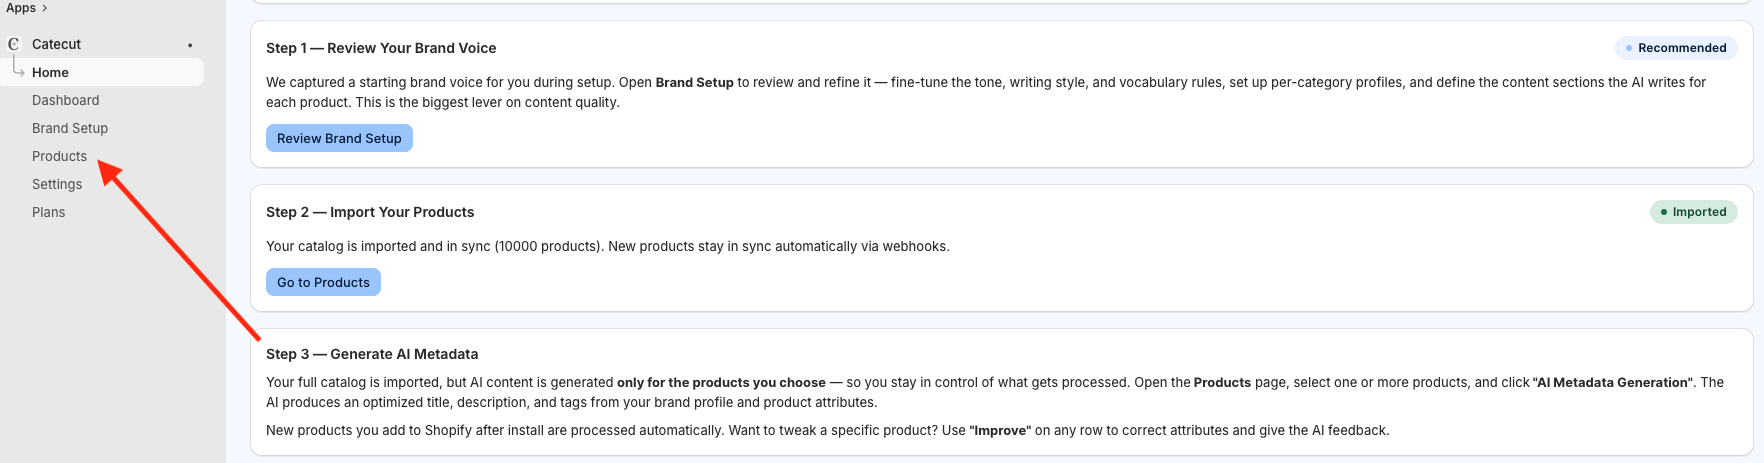
The AI Metadata button appears in the top right corner of the Products dashboard in the Catecut app. The AI metadata feature will only be active once products are selected.

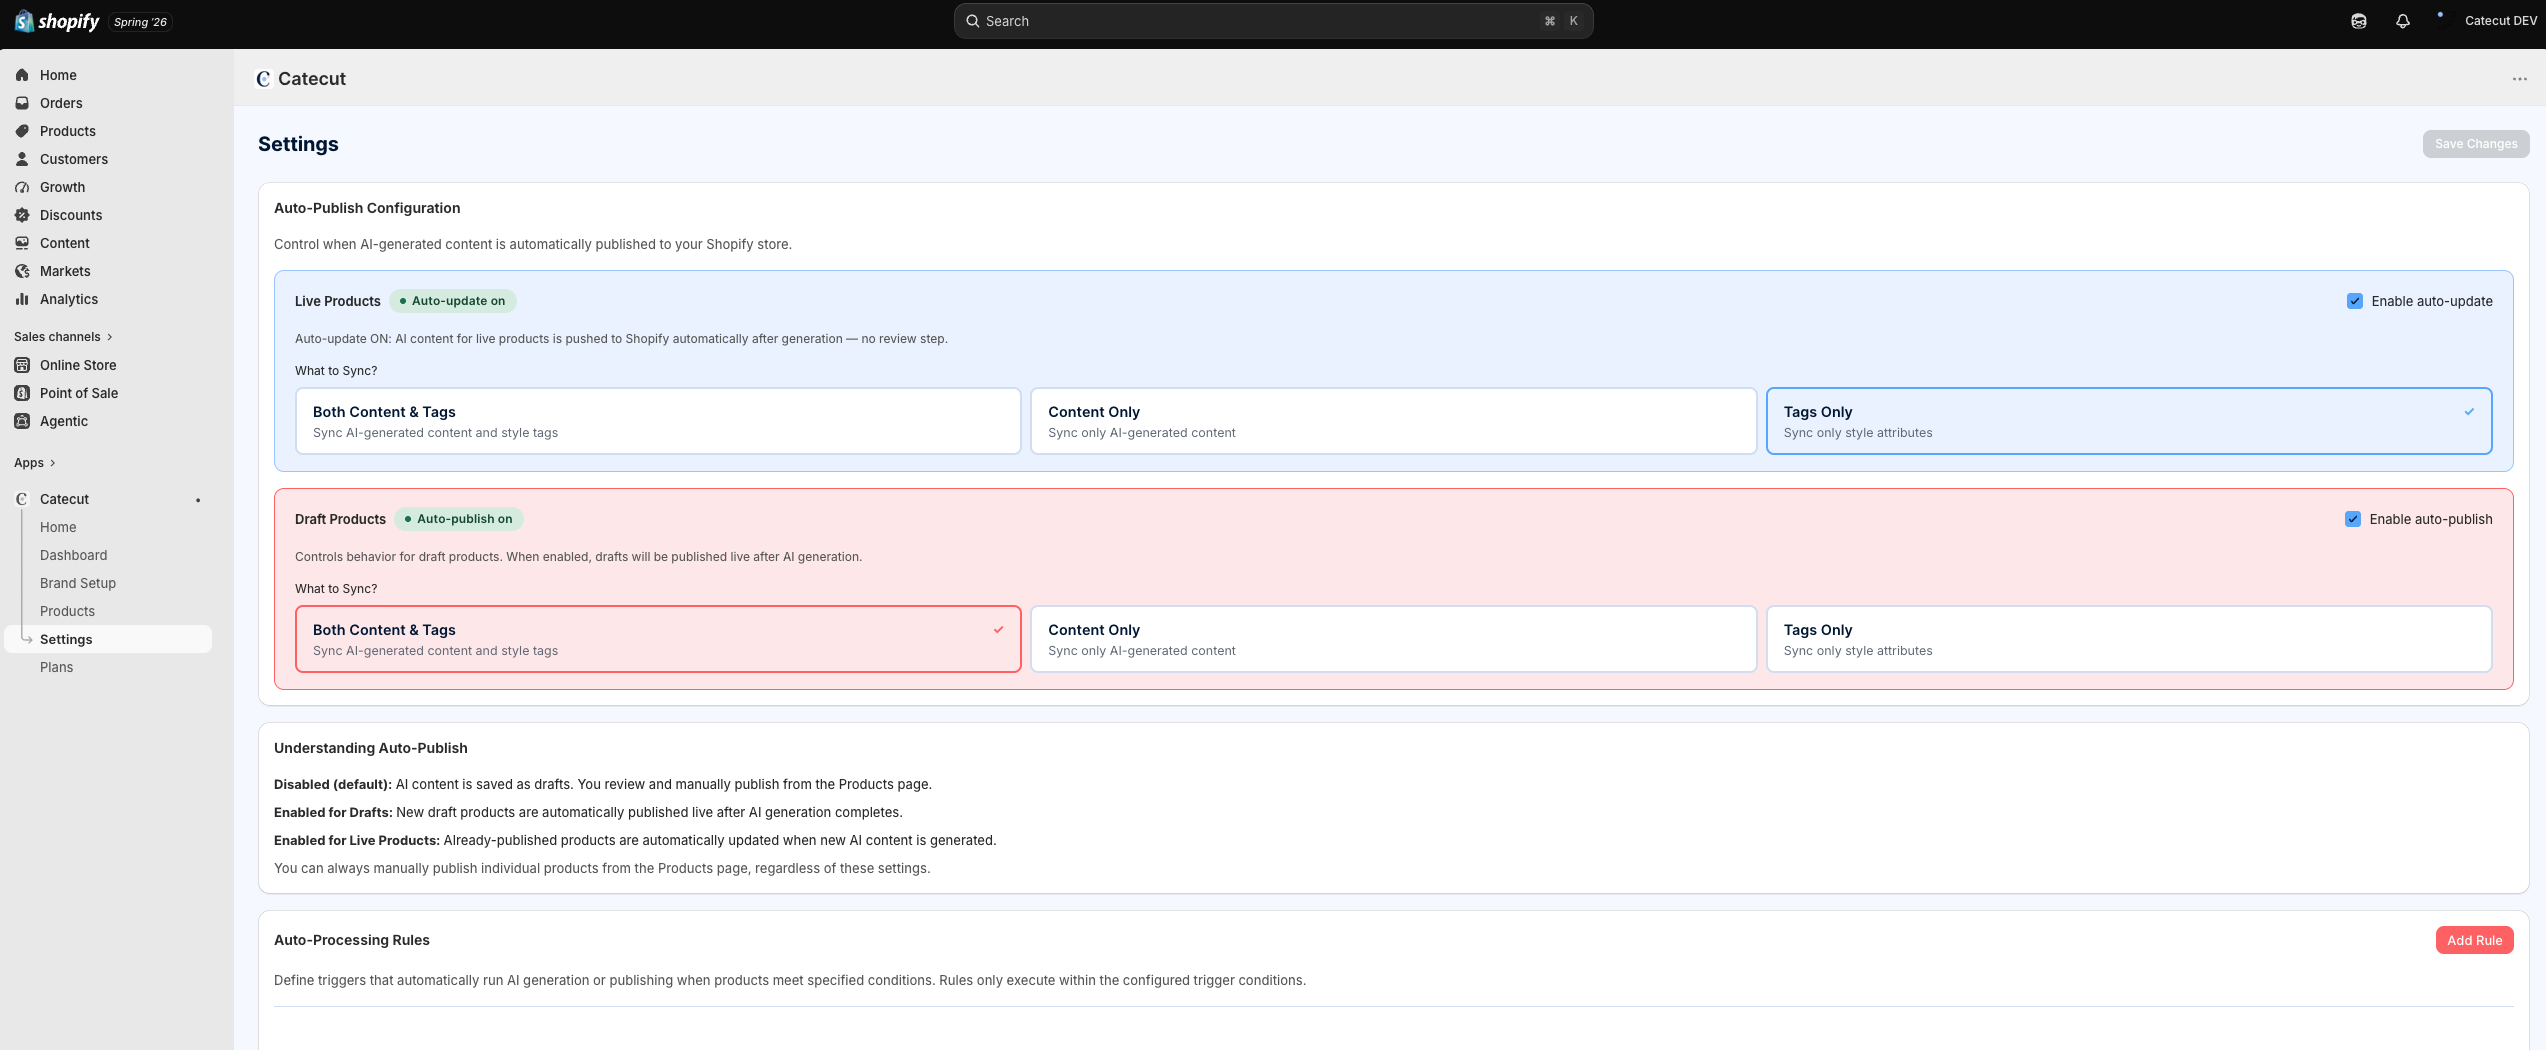
STEP 4: Choose Publishing Behavior
This may be one of our best built-in features, besides the content automation. It gives you full control of how and what is published. Established brands already have products on their online store, but their SEO and AEO may need some nurturing. Or you may only want to update draft products, leaving the live products untouched.
That’s why Catecut lets you choose how you manage your publishing settings, whether you want to publish both content and tags, or content only (title, descriptions), or tags only (tags, product type, product metafields). This rule is available for both your live products and those you have in draft.
For example, if you only want to augment your live products with discovery tags, simply select “tags only”.
Product Content Creation
Now that you’ve set up your brand, categories, page formats and other rules, it’s time to generate, review, approve, and publish your product page content to your online store! You have full control, whether to publish Catecut-generated content and tags, or segment what is and is not published.

Generating, Reviewing, Approving, and Publishing Content
The Products section in the Catecut app is where most of the action happens. Here, you can generate, improve, edit, approve, and publish product page content for your products.

Apply All Drafts enables you to override the product settings you set up in the Publishing Behavior rules, and select whether to publish regardless of whether the product is listed as active or draft.
Re-predict attributes does exactly what it says– lets you repredict attributes for all or a selection of products.
Refresh Catalog from Shopify is a function that’s most useful when you are getting started or when you have a larger team that may be editing or updating directly through Shopify. A great example is when a marketing or commercial team may have a seasonal sale, or may be updating content to leverage a sudden shift in social media trends. It enables easy syncing to pull in current product data so the content is always up-to-date (while version history provides an extra layer of protection to ensure nothing is lost).
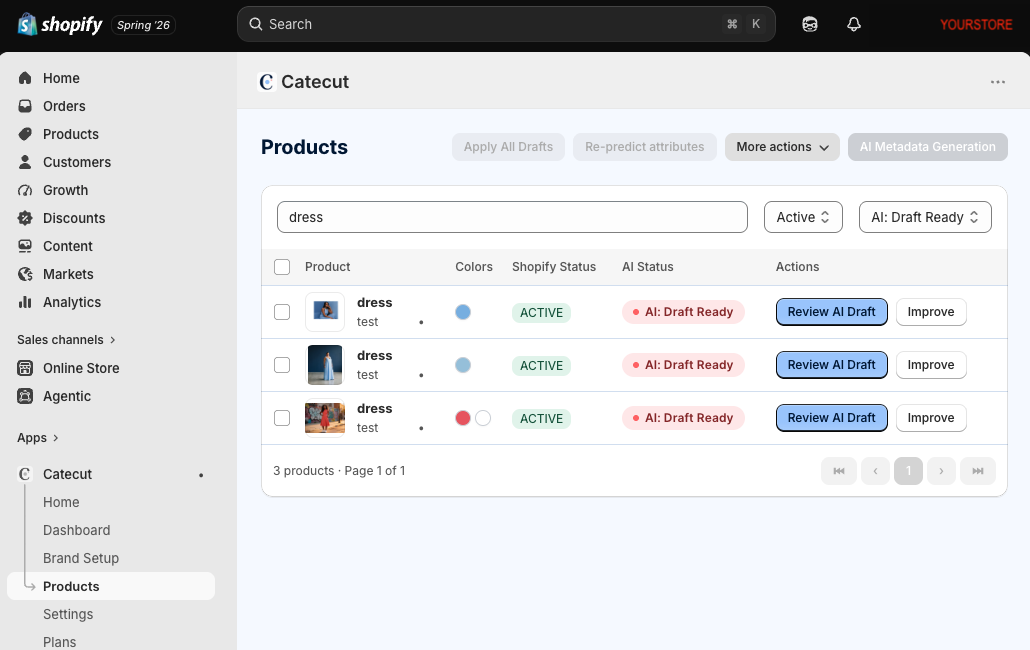
Search bar enables you to search for products by category, name, feature, color, and other characteristics. You can also select products using one or both of the dropdown menus by publishing status or AI status.


Content review and editing
Once you have generated content, you will be able to see content side-by-side.
Content Diff (short for content differences) is the side-by-side comparison of existing published Shopify page content versus the Catecut AI-generated content, which is driven by brand, category and publishing input and rules you established at setup.
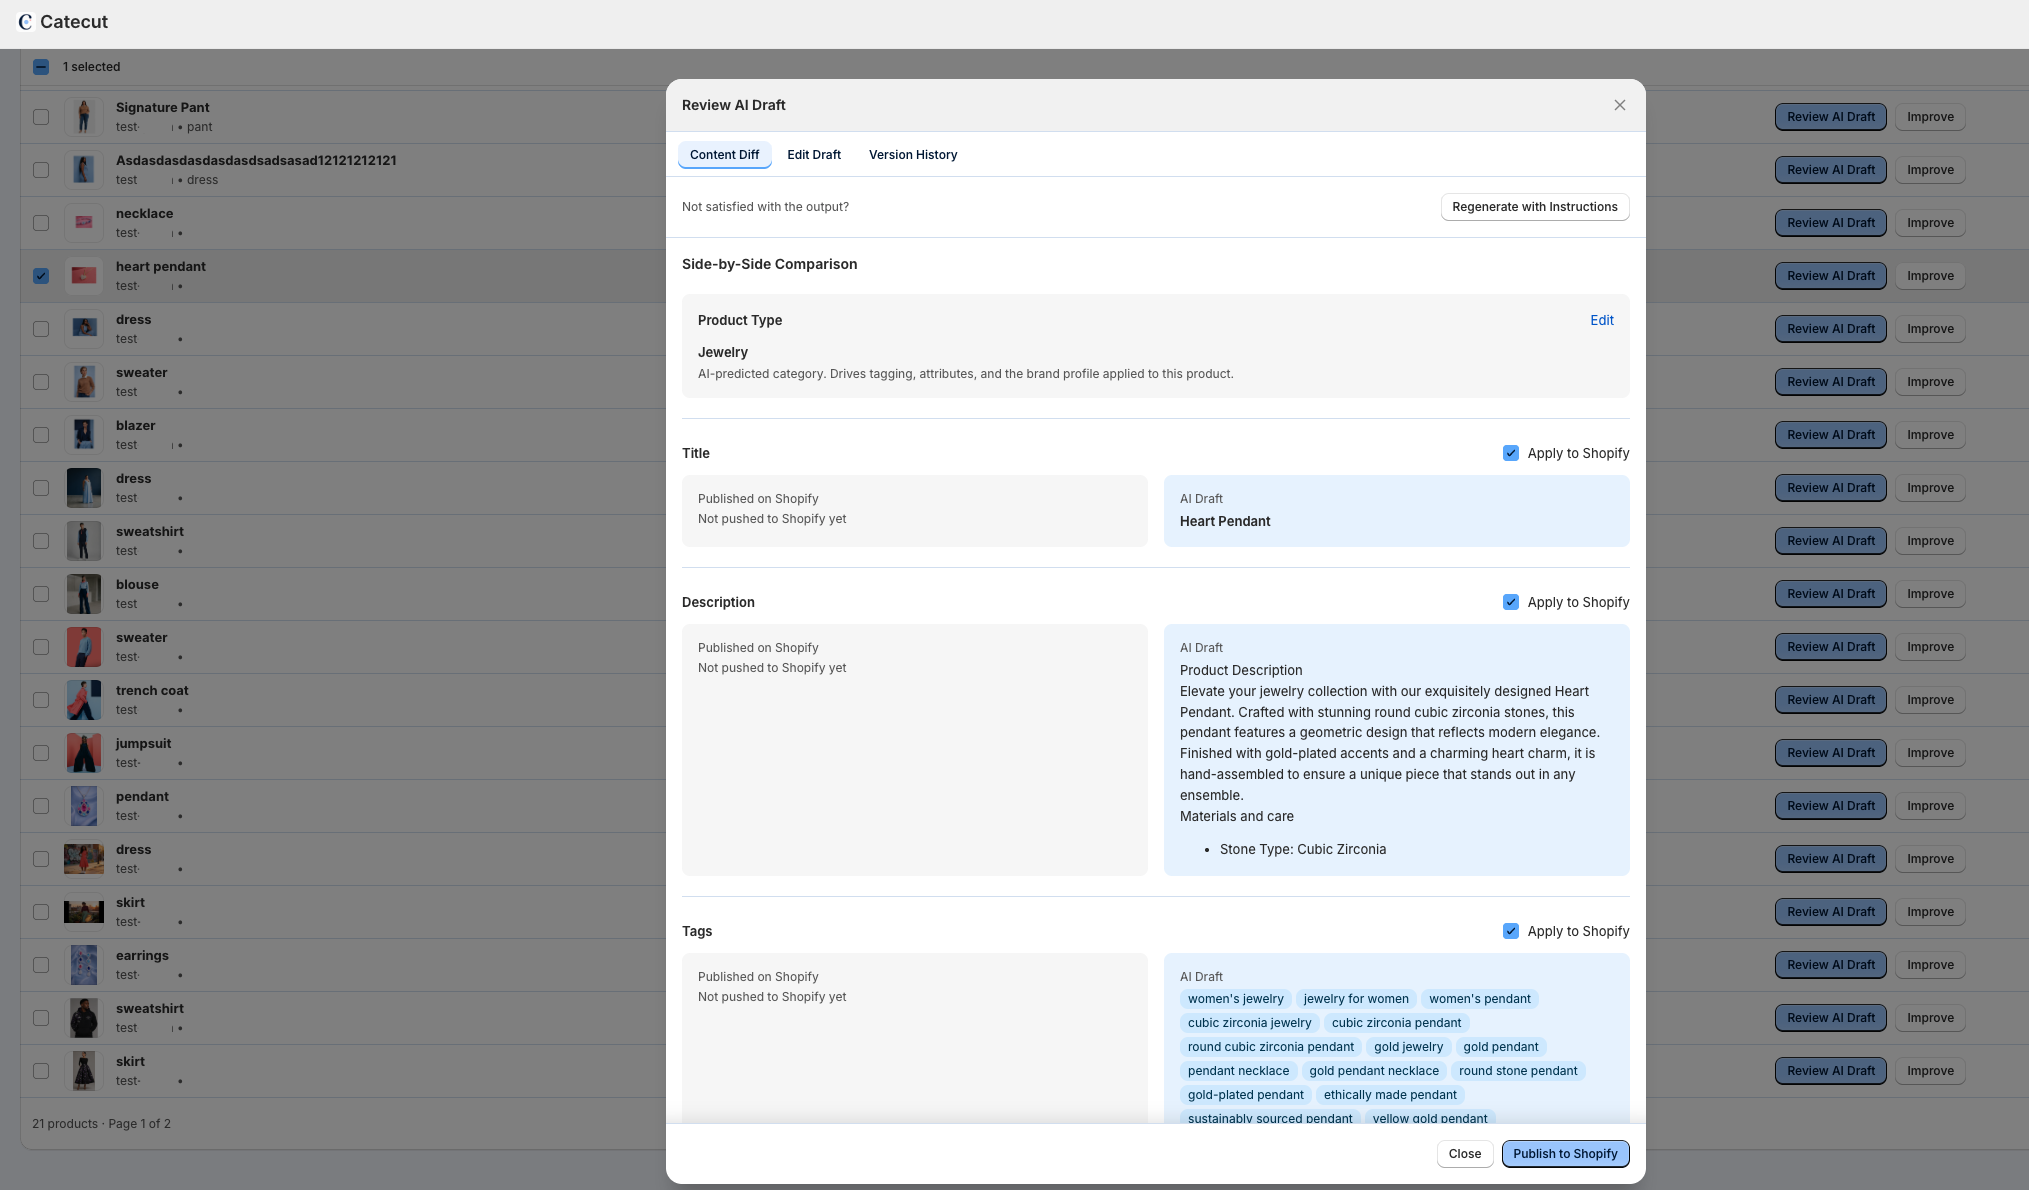
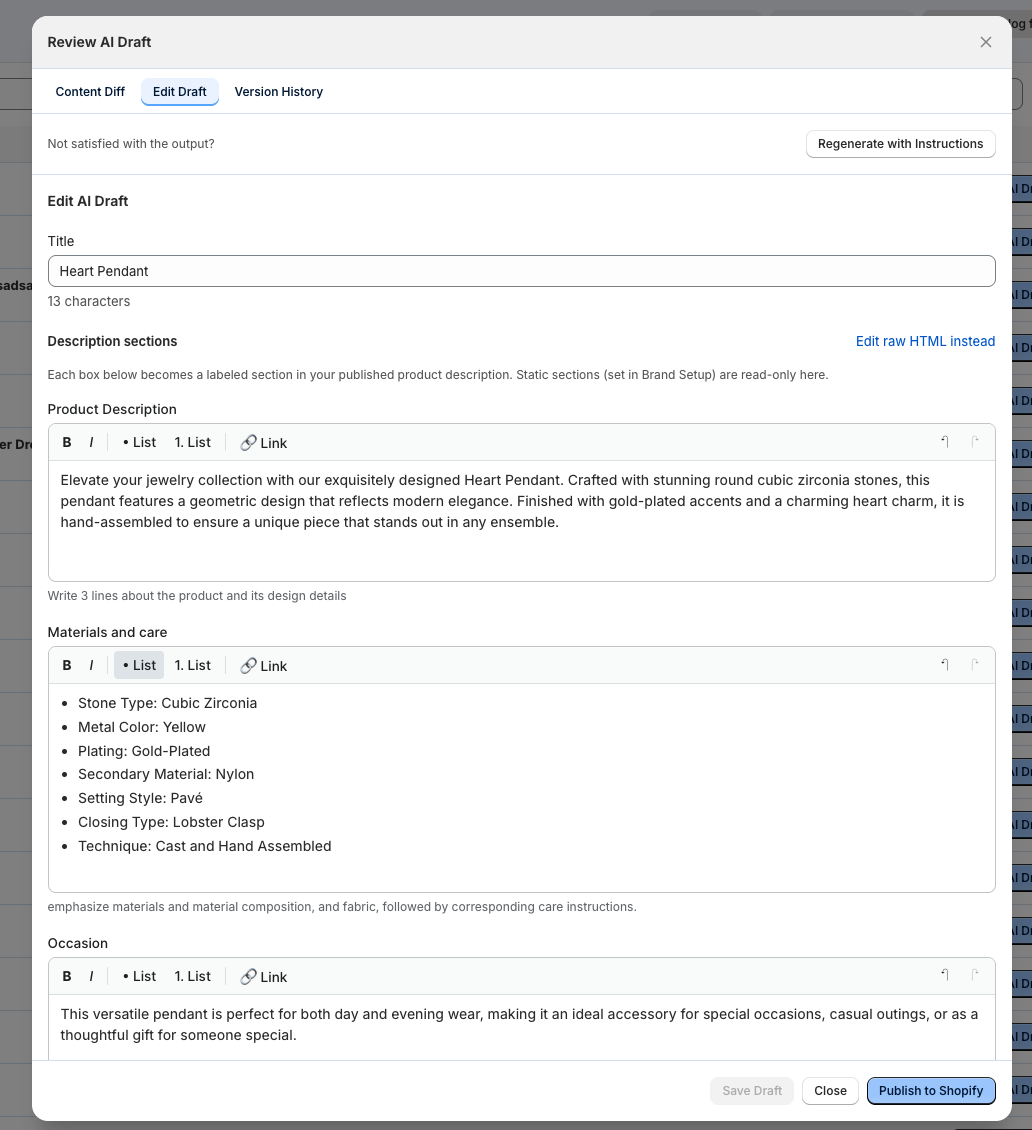
Edit Draft enables you to edit the drafts across all content and tags. Importantly, you can also regenerate with instructions, which acts as an additional prompt and enables a granular level of specificity.
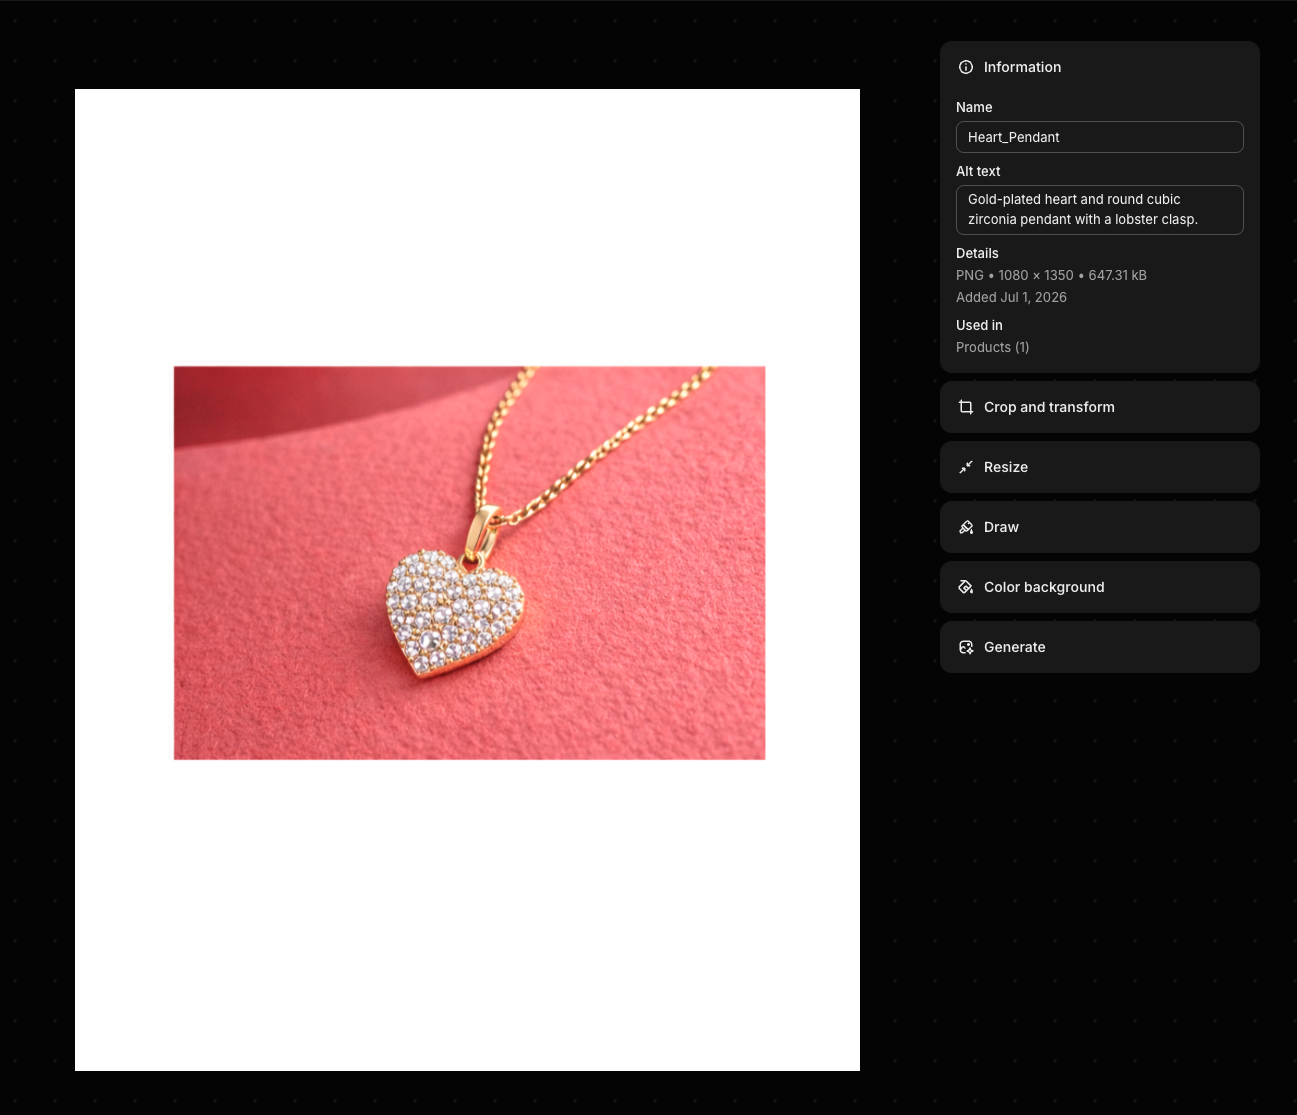
To review Image Alt Text details Click on Products menu in your main Shopify menu, and select the images you wish to review, edit or regenerate the alt text. Here you can also perform other functions leveraging Shopify’s built-in image functionality, like changing the image titles, and generating and editing image features.
Version History let’s you see and restore earlier versions of content and tags.

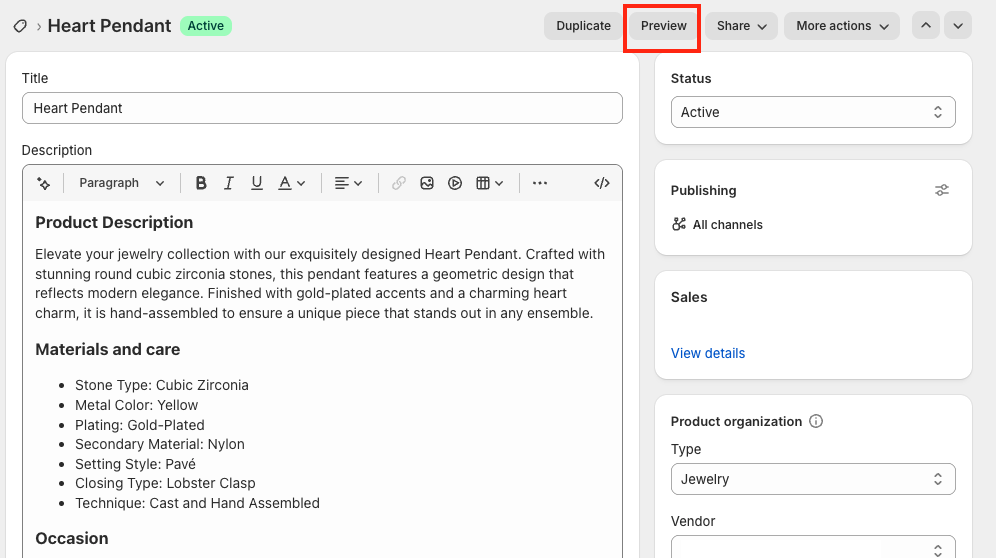
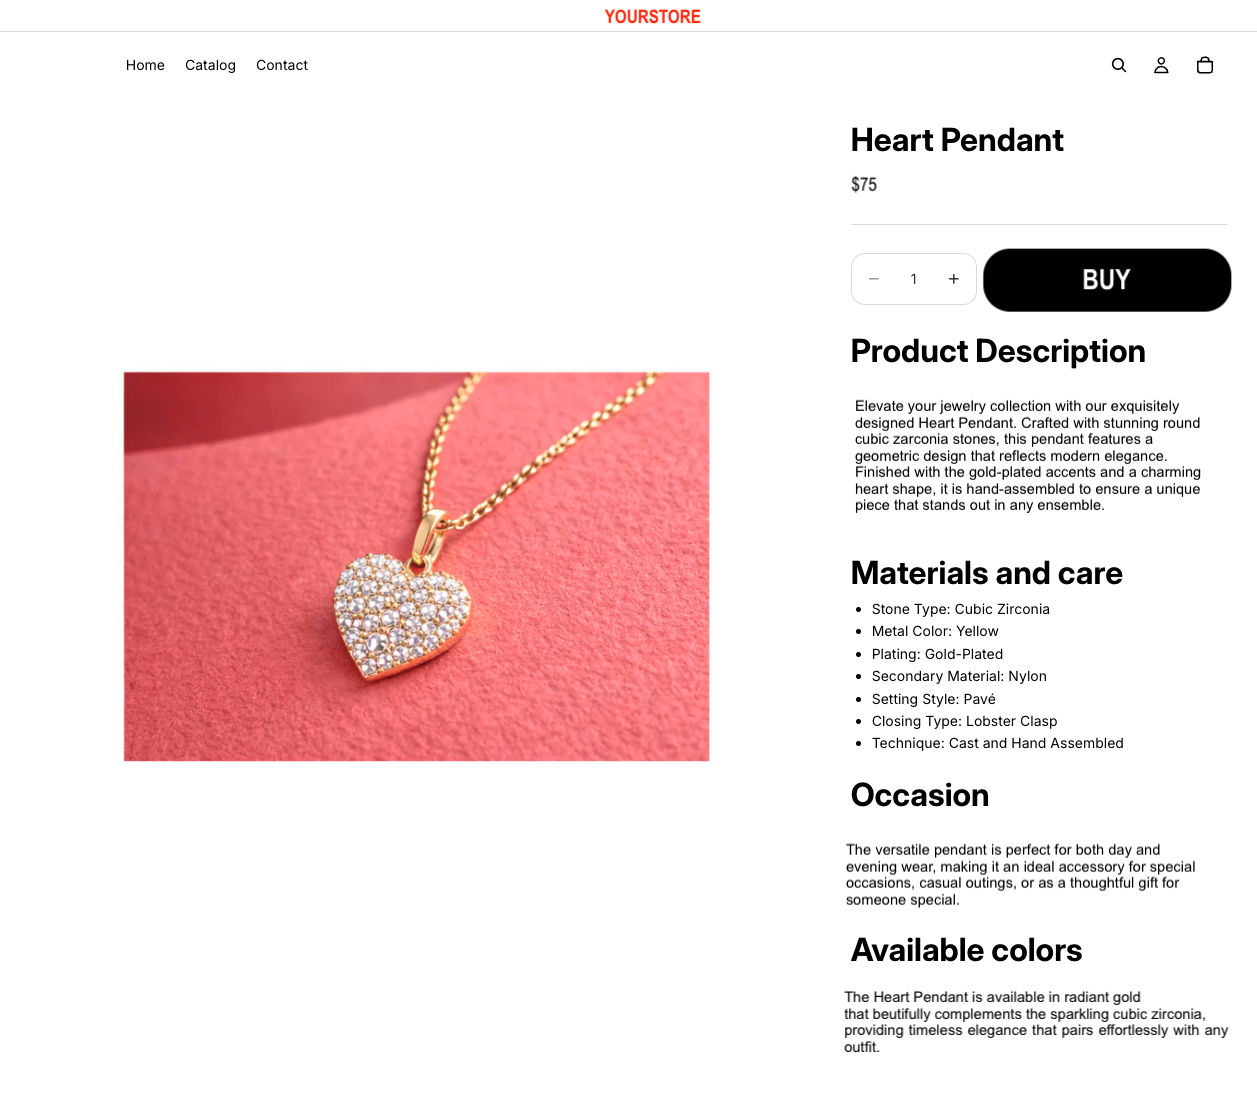
Preview Products in Shopify
Once you have published your products to Shopify, you can go out of the app, and click on the Products section within your Shopify store menu. There you can select preview to see at-a-glance how the new content and format look on your online store.
Catecut Savings and Progress Dashboard
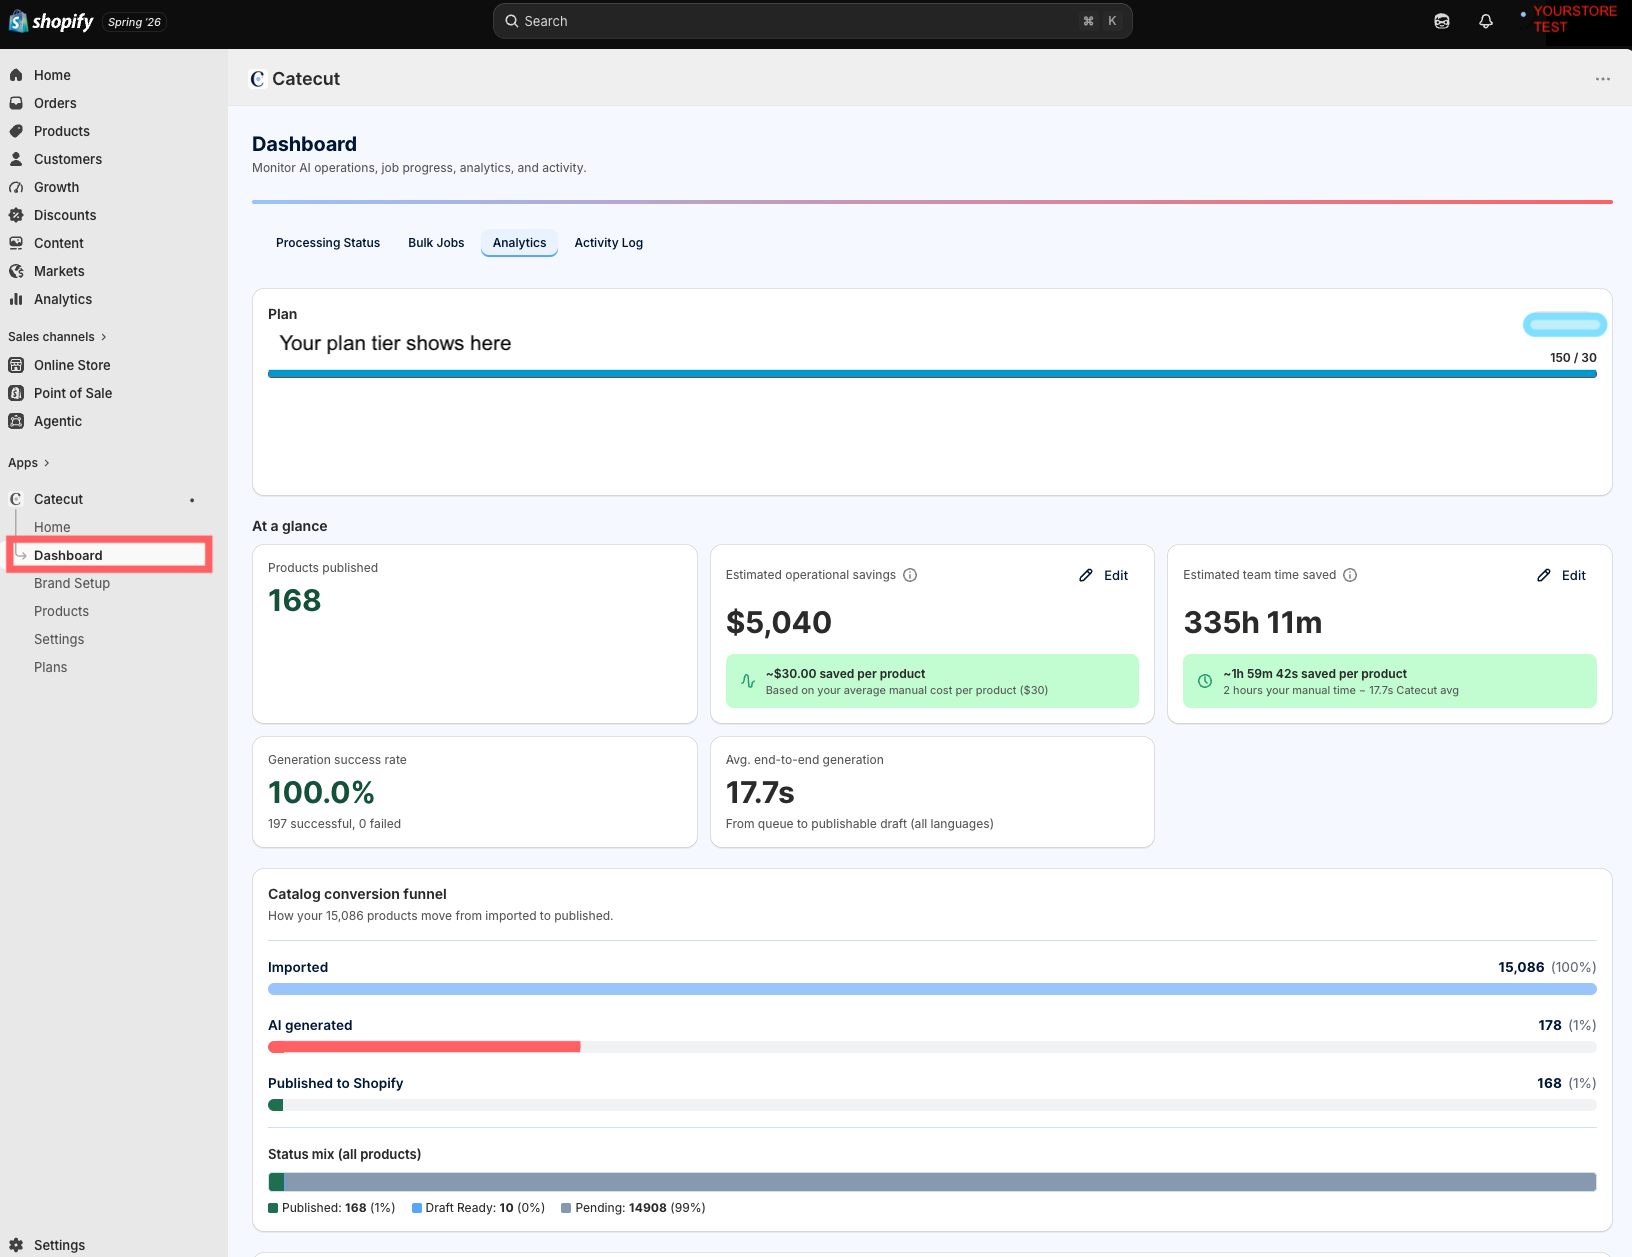
Built into Catecut’s app, is a unique savings and progress dashboard that gives you an at-a-glance overview of everything from your cost savings and time saved, to important in-app activities like:
•processing status
•bulk jobs
•analytics
•activity log
You can adjust the cost savings and time savings sections to reflect your actual costs and time spent per product from your previous manual or semi-manual processes (such as costs and time your team spent writing titles, product descriptions, creating and updating SEO, image alt-text, and conducting manual and bulk uploads by CSV. Use this data to share the digital transformation value with key stakeholders or for your own team insights and presentations.