

Catecut Shopify App Instructions and Getting Started
Get started in 6 steps
Welcome to Catecut! This page takes you from install to your first published product in about 15 minutes.
You'll find Catecut under Apps in your Shopify admin. The Catecut menu has five pages: Products, Brand voice, Collection rules, Settings and Plans.
Nothing changes on your live product pages until you choose to publish, so you can try everything safely.
Step 1: Start your free trial
- Open Catecut from Apps in your Shopify admin.
- Choose the plan that fits your catalogue and click Start 7-day free trial.
- Approve the subscription in Shopify. You won't be charged until the trial ends, and you can cancel any time.
Your products are imported automatically as soon as Catecut is installed. New products you add in Shopify are picked up automatically too.
Step 2: Set your brand voice
Your brand voice tells Catecut how to write for you. It takes about 2 minutes, and without it drafts come out generic.
- Click Brand voice in the Catecut menu and open the Default profile.
- Describe your brand, who you sell to and how you want to sound. A few sentences is enough, or paste your style guide.
- Click Analyse & Continue, or Extract from catalog to let Catecut learn from your existing listings.
- Check the Brand voice, Sections and Title rules steps and adjust anything you like.
- On Review & save, click Generate sample to see a real product written in your voice, then Save & Finish.
The Default profile applies to every product. Once Catecut has detected your product categories (for example dresses or coats), they appear under Detected categories, and you can give any of them its own profile.
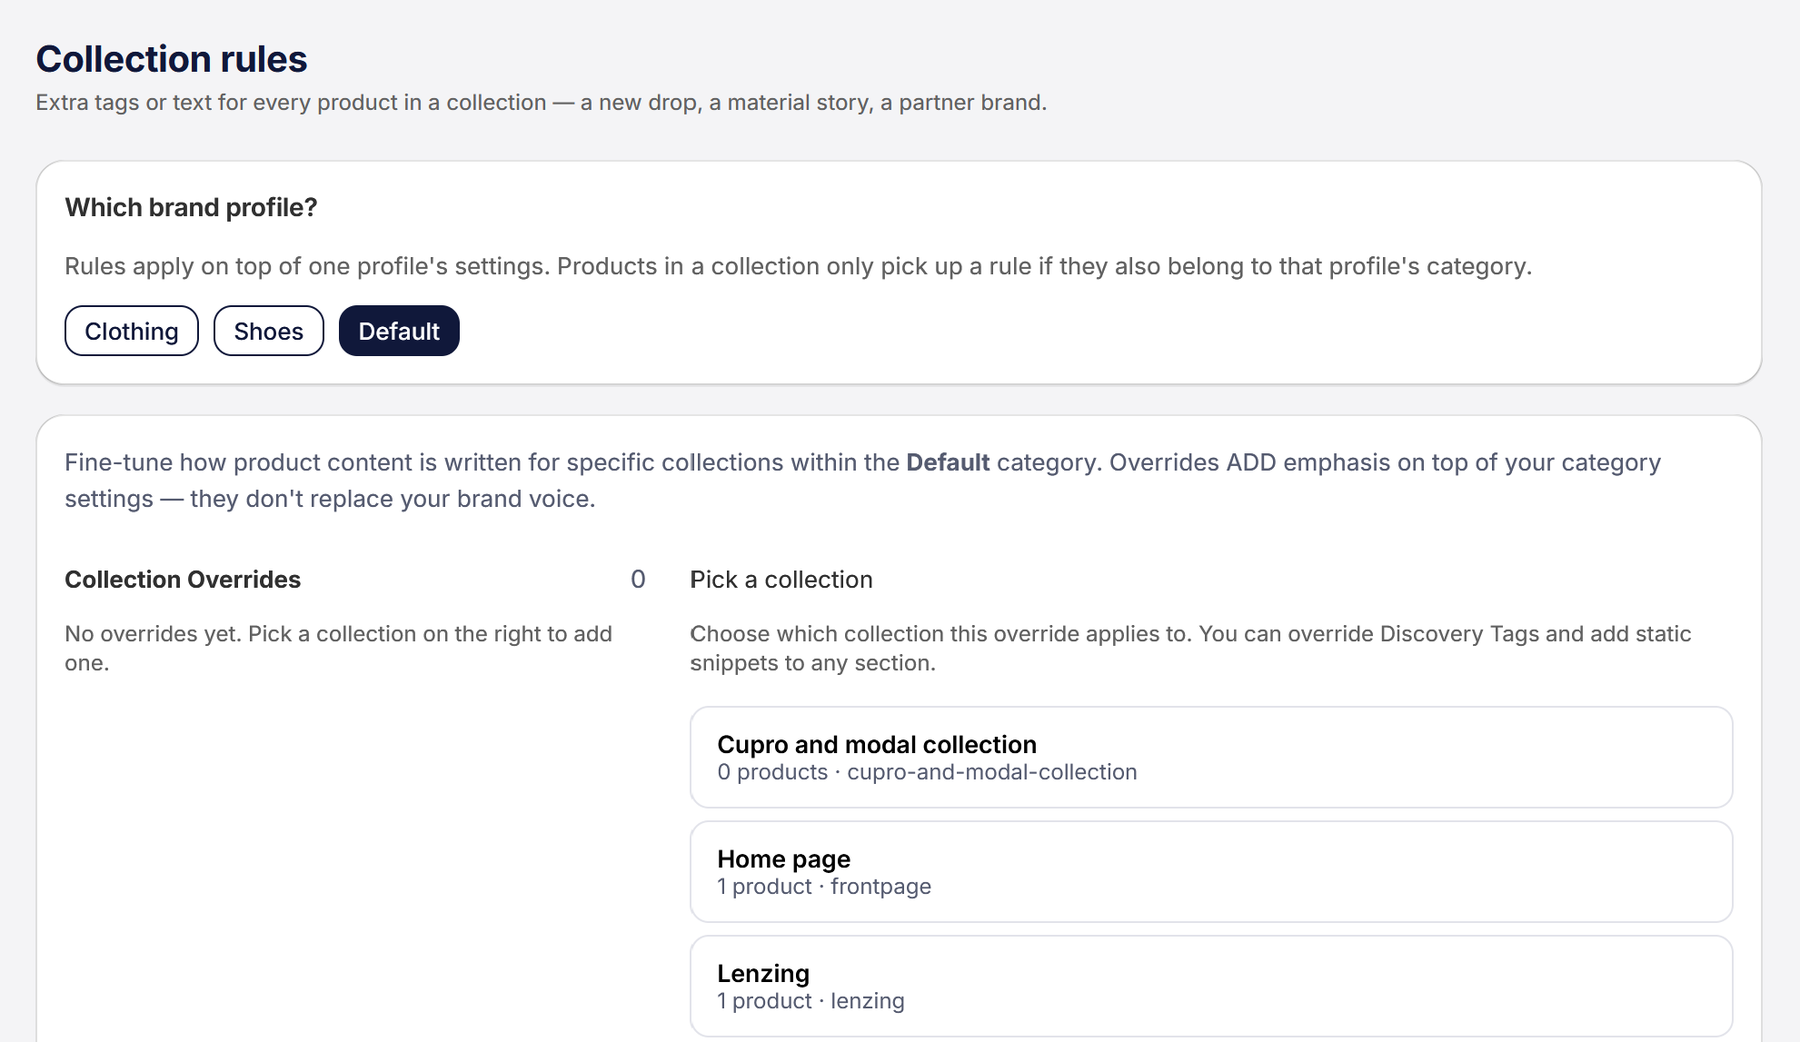
Multibrand retailers: use Collection rules to add brand-specific tags or fixed text on top of a profile.
Brand Setup: Sections
Brand Setup: Sections FAQs
Collection rules
Step 3: Generate content
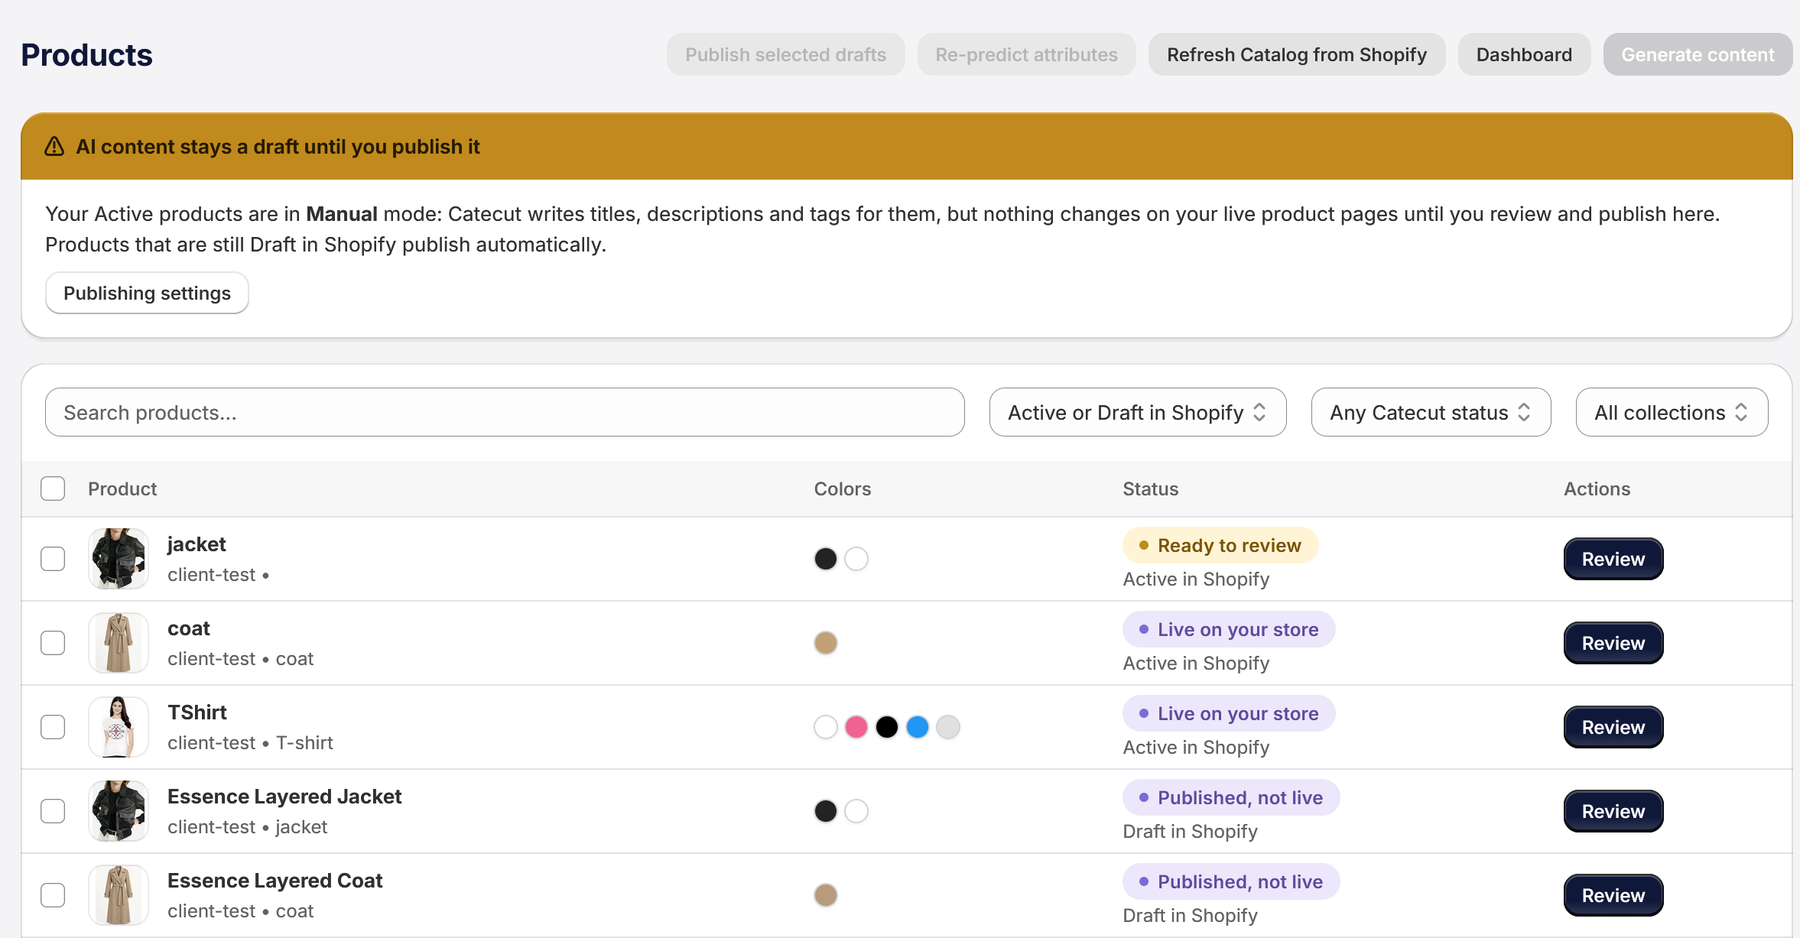
- Click Products in the Catecut menu (not the Products page in your Shopify menu).
- Tick the products you want written, or select all.
- Click Generate content and choose what to write: Title, Description and Tags. Leave Keep my product names ticked to keep your current titles.
- Optionally add instructions for this batch, then click Generate.
Drafts are usually ready within a minute. You can leave the page while Catecut works. When a product shows Ready to review, move on to Step 4.
Step 4: Review and publish
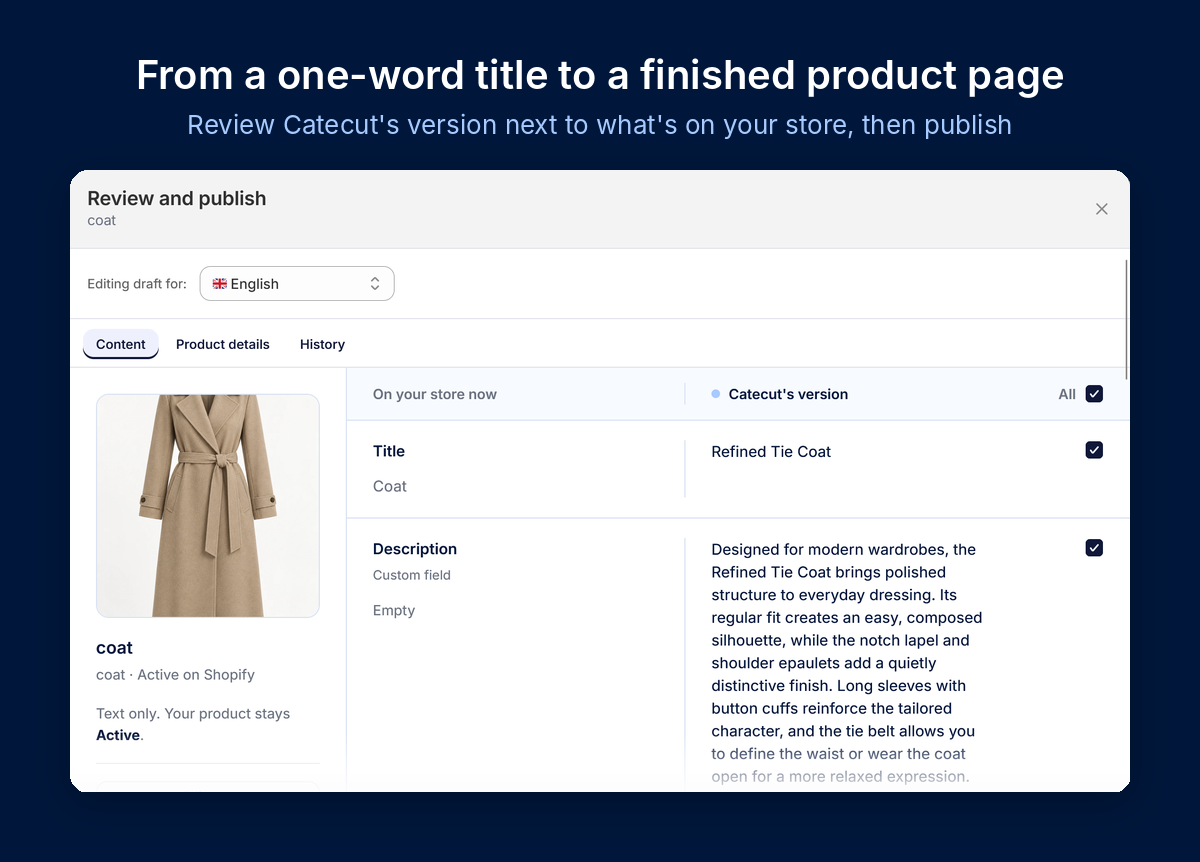
- On the Catecut Products page, click Review next to a product.
- Compare On your store now with Catecut's version for the title, description and tags.
- Untick any change you don't want. Use Edit tags or Rewrite tags to adjust tags.
- Click Publish. The product's status changes to Live on your store.
The Product details tab shows the attributes and colours Catecut found in your photos. The History tab lets you see and restore earlier versions.
Good to know: Active products never change until you publish them. Draft products publish automatically by default, so they're ready when you set them live. You can change both in Step 5.
Step 5: Choose your publishing settings (optional)
Click Settings in the Catecut menu to decide what gets published and when. You can set this separately for Live Products and Draft Products.
- Publish automatically: off by default for live products, so you review everything first. Turn it on to publish straight after generation.
- What to publish: Both Content & Tags, Content Only, or Tags Only. For example, choose Tags Only to improve search and filters on live products without touching their descriptions.
- Languages to publish: pick which languages go live if your plan includes extra languages.
Click Save Changes when you're done.
Step 6: Check your products in Shopify
Open the product from Products in your Shopify menu to see the new description, tags and image alt text. Click Preview to see how it looks on your store.
That's it. Repeat Steps 3 and 4 whenever you add new products.
Optional: publish to your own custom fields
If your theme shows content in its own fields, for example a Fabric & Care or Size & Fit accordion, Catecut can write straight into them.
- In Shopify, go to Settings → Custom data → Products and check the field is listed. If it isn't, create it: Multi-line text, with Translations on if you sell in several languages.
- In Catecut, go to Brand voice, open your profile and go to the Sections step.
- For each section, choose your field under Publish to custom field, then save.
- Publish one product and check the field is filled in Shopify and on your storefront.
Using Accentuate or another metafield app? Some apps store fields without a native Shopify definition, so Catecut can't see them. Create a Shopify metafield definition for the field (owner: Products). Your existing data stays as it is.
Still can't see your field? Send us a screenshot of Settings → Custom data → Products and we'll help.